Configuring Polycom Sound Point 3xx/4xx/5xx IP Phones With CloudNippon
Step 1: First you will need to factory reset the phone. To reset the phones’ local configuration or web configuration: a. Press Menu button. b. Select Settings > Advanced. c. Enter the administrative password, then press the Enter soft key The default password is “456”.
d. Select Admin Settings > Reset to Default and choose either Reset Local Configuration or Reset Web Configuration as desired. e. When prompted to confirm the reset, select the yes soft key.
Note: For more information, please refer to Polycom_Factory Reset.
Step 2: To Find the IP address of the phone Go to Menu > Status > Network > TCP/IP Parameters. For example IP address is 192.168.1.147
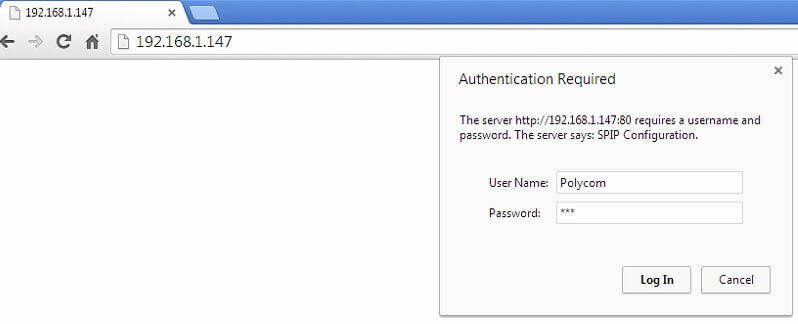
Step 3: Point your browser to the web interface of the phone: http://192.168.1.147 Note: Both IP phone & computer should be connected same LAN Enter the default Username: Polycom Password: 456


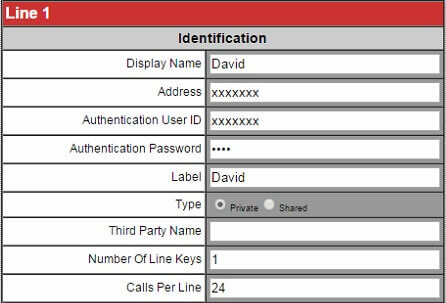
Step 4: In the Identification section of the Lines tab, enter the following information.
Display name: Enter the name you want to appear on the phone’s display
Address: < sip username >
Authentication User ID: < sip username >
Authentication Password: < sip password >
Label: Enter the name you want to appear on the phone’s display


Step 5: In the Server 1 section of the Lines tab, enter the following:
Address: siptrunk.cloudnippon.com
Port: 5060
Expires: 600


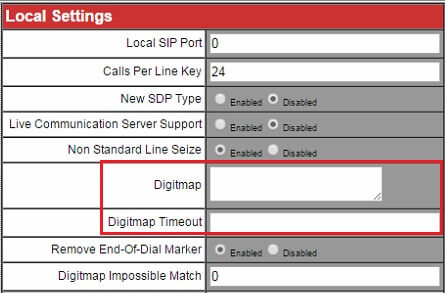
Step 6: In the Local Settings section of the “SIP” page, set the Digit map field to blank by removing all the contents. Click the Submit button at the bottom of the page. Your Polycom phone will restart itself.


Dial Pattern:
For Singapore 65 + < Number >. Ex: 6563401006
For International Prefix: 00 + < Country Code > + < Number >
Ex: 00+91+9965566640(India Mobile).
